Friday, April 30, 2010

Spring Colored Candy Mints

Spring time means flowers, warmer weather, Spring showers, and Color! I came across a recipe for these cute little candy mints; so easy to put together and the flavor reminds me of the filling I used to make for my Mom's chocolate, mint fudge when I was growing up. I have not tasted this filling since then, and I do not even want to remember how long ago that was!
My photo-taking is a little off because the color did not come out crisp for me. The top photo is color true.
The little mint recipe is called Cream Cheese Mints and I actually found the recipe in one of Paula Deen's magazines so I thought I would share:
Cream Cheese Mints
(adapted from Paula Deen)
1 (3-oz.) package cream cheese, softened
1/4 cup all-vegetable shortening
1/2 t. peppermint oil - or flavor of choice
4 cups confectioners' sugar
Directions:
Line a baking sheet with parchment paper. In a medium bowl, beat cream cheese, shortening and peppermint (or flavor of choice) with a mixer until smooth. Gradually add confectioners' sugar, beating until well combined. (Dough will be soft and elastic.) Roll dough into small balls, and place each ball on prepared baking sheet. Press fork into each ball to flatten. Cover baking sheet with plastic wrap and chill mints overnight.

Bright Lights, Big City

As long as I can remember, I have felt a pull between two opposites- a love for the countryside and a love for the city. While I am completely at peace in the country, there is something about big cities that makes my pulse race in the most exhilarating way.


Helena Palazzi Photography

The traffic. The noise. The people. The lights. The buildings. All of these things and more capture a piece of my heart.


Martin Rusch

I love staring out a window many stories in the air, taking in building upon building with skyscrapers lined up as far as the eye can see.


Helena Palazzi Photography

Especially at night. When light and darkness meet halfway.


Troy House Photography

For the next few days I will be in and around New York City, and my heart is filled with happiness. I have a weekend filled with not only the excitement of the city, but also the company of family and friends, ones who it has been too long since I've last seen.

Midweek, I move on to Massachusetts to spend time with some more close friends who I also haven't seen in far too many years, and I most likely will be MIA for a little over the next week; I hope during that time you have many moments of sweet bliss, as I intend to enjoy many of the same.

Happy weekend!

We are in NYC this weekend meeting up with some of our 2010 couples for some fabulous photodate sessions, 8 to be exact (we're sneaking in one pregnancy portrait and one sexy session too)!

Can't wait to see everyone and snap it up in the city!

So not to worry if the blog is quiet for a few days...it's going to be blowing up soon enough!

Amazing shoot coming up...

I just love the style and colors of an amazing collaboration in the works. Here's one sneak peak photo of a piece I shipped off yesterday (along with a few others). Have I ever told you my favorite colors in the world are peach and mint? Not pink or orange.... not green or blue... both are inbetween, but I love them:


Twigs & Honey veil + Elizabeth Dye dress :: Just like heaven

It's no secret... I LOVE Elizabeth Dye's work. You know she made my wedding dress SUPER fabulous, yes? With gorgeous lace overlay, details, and detachable floral and chiffon bustle/train... So, I loved seeing this pairing from the amazing photographers, Sweet Little Photographs for their Lovely Bridal Shop shoot. A Twigs & Honey Soft Light Lace veil and Elizabeth Dye dress:


I love this photo... there's a Twigs & Honey mini bridal hat on her shoulder:


Photo credits: Sweet Little Photographs

shabd love

I LOVE shabd's designs and in particular, I love this new dress for the autumn/winter 2010 collection:


University of Cookie: Royal Icing

Hey guys! A quick note to let you know there's a new vlog over at University of Cookie. This one is called "making royal icing."

Come take a peek! {I may or may not have invented a new drinking game to go along with it!} ;)

Wags 'n Whiskers flower challenge, a sale, and news about the next release!

Yay! It's Friday! :) Hope everyone is having a fabulous week! It's time for a new Wags 'n Whiskers challenge, and this week, the fabulously talented Jeanette is asking us to use flowers. I was commissioned to make a Mother's Day card with two boys with skin of color. So I chose both Super Ryan and Just For You. Aren't they too cute? I love these two together, because "Just For You" does indeed look like the older brother, don't you think? I stamped them in Memento Tuxedo Black ink and colored them with Sketch Copics. I then cut them out and double popped them off the card.

And right now, both of these stamps, as well as all the Wags 'n Whiskers stamps illustrated by Crissy Armstrong, are on sale for 25% off!!! How cool is that!! If you've been wanting to get some of them, now is the time!

Please be sure and pop over to the challenge blog to see the rest of the Divas fabulous creations! We're sadly saying goodbye to Bree from her GDT spot, and welcoming Melanie on board as our new GDT. We'd love it if you played along with the challenge, and this time you have two weeks to play along, because next week is the NEW SUMMER RELEASE of Wags 'n Whiskers! So hope you stop by on Wednesday and Thursday for the sneak peeks, and then again on Friday for the celebration blog hop for the new release! The new stamps are sooooo CUTE, and I can't wait for you to see them! Thanks for stopping by to see me today, and hope to see you back again soon! Hugs!
Images: Super Ryan and Just For You - Wags 'n Whiskers; background and sentiment banner - Magnolia-licious
paper - DP - Nitwits; cardstock is Bazzill
ink: Memento Tuxedo Black, Copic Sketch markers
Misc: silk ribbon, charms, machine stitching, oval Nestabilities, dimensional tape

Thursday, April 29, 2010

Colourful


I love this fashion shoot featured in W Magazine celebrating admirable women in Spring attire! It's so colourful and so Bohemian and how gorgeous is that patchwork vintage style sofa in the picture above!


Photographer - Bruce Weber, Stylist - Camilla Nickerson

Inspiration from Sarah + Sean

Last August Mariah and Lisa shot the wedding of Sean and Sarah...hello pink and green details! Sarah is a Lily Pulitzer kind of girl and carried that style throughout her wedding, a georgeous day indeed!Venue: Blithewold Mansion
Flowers: Sayles Livingston
Caterer: Morin's

Wednesday, April 28, 2010

Black & Spiro One Day Only Sale


As we are about to embark on the remainder of our exciting renovations in under 2 weeks, we have decided to have a ONE DAY only sale.

The last famous Black & Spiro sale was approx 3 years ago so this one is definitely not to be missed!!!

All floor stock including furniture, lamps, shades and accessories will be heavily discounted, as well as a huge range of amazing fabric remnants reduced to clear. I am also throwing in some things from my own home so make sure you don’t miss out.

Remember, the sale is only on for one day!!!

Hope you can make it.
xx
Anna

For a very POPular Teacher . . .


Can it be? Summer is almost here? But before summer...it's time for teacher appreciation gifts!


Welcome to those of you coming from Woodlands Family Magazine (and to everybody else, too)! I'm so happy to be working with Melissa of Domesticated Lady (you're going to love her!) to bring you not only a how-to for cookies, but an adorable FREE printable topper as well!


Let's get started on the cookies (you can make these NOW and freeze them until the end of school!):

  • Make sugar cookies using a candy corn cookie cutter (it's a multi-tasker) and let cool.

Using red royal icing and a #3 tip, pipe the outline of a popcorn box (AmeriColor Super Red).

  • With a #2 tip, pipe a wide oval in yellow icing (AmeriColor Egg Yellow).


  • With another #2 tip, pipe the outline of popped popcorn above the box in white (add AmeriColor Bright White for extra white).
  • Thin the yellow icing with a bit of water, stirring gently until it is the consistency of thick syrup. Let sit several minutes covered with a damp dishtowel (see a video of this process here).
  • Gently stir the icing with a rubber spatula to pop any air bubbles that have risen to the surface and transfer to a squeeze bottle.


  • Fill in the oval and part of each popcorn piece.
  • Thin the white icing in a similar fashion.


  • Fill in the popcorn box and the remainder of the popcorn. Swirl the yellow and white icings together on the popcorn.
  • Let dry at least 1 hour.


  • Using a #5 tip, add wide red stripes to the popcorn boxes.
  • Switch to a #2 tip and pipe "POPcorn" in red on the oval.


  • Outline the oval in red using the #2 tip.


  • Let the cookies dry overnight before packaging.
My favorite part? The swirly popcorn pieces:


The free printable topper is available from Domesticated Lady here.

Melissa, of Domesticated Lady) has so many wonderful ideas...I know you'll want to check out the rest of her darling blog while you're there! (And the online version of her article about the toppers/cookies is here.) It was a pleasure working with Melissa...this theme was all her idea...she is so creative!!!

If you want to make a few individual popcorn pieces to go along with these, check out these too cute cookies from The Decorated Cookie! Is that the cutest idea, or what?

You know what? I made popcorn cookies about 5 years ago and I am so glad to get a chance to update them. Wanna see?


I like this year's version much better!

I'll be linking it to TidyMom's I'm Lovin' It linky party. :)

Have you planned your teacher gifts yet?

Going to the Dogs

I've mentioned before how head over heels E and I are for our two dogs, so it might not be surprising we both desired to have them be part of our wedding celebration. While we weren't able to make it happen, I still love seeing when couples do include a furry, four-legged family member in their big day!


Who Makes the Best Fried Chicken?

We are on a plane flying down to my parents last August. The carry-on bags are packed full of reading material . . . okay cooking magazines to share with Mom and 1 Newsweek. Reading recipes seems Ho-hum (I know, shocking!!!!) so I open up the Newsweek and a Revelation happened. My Nemesis appeared in BOLD letters: The perfect fried chicken debate! The perfect fried chicken has eluded my kitchen and I have almost given up . . . until Newsweek . . . offering a brilliant solution for those of us still searching!
The article in question:

Heaven, Fried
Who makes the best fried chicken: a Michelin-rated chef or a Southern master?

By Julia Reed NEWSWEEK
Published Jul 9, 2009
From the magazine issue dated Jul 20, 2009

Click on the recipe title and you will be taken directly to the article that opened my eyes to a whole new definition of Southern Fried Chicken.

The debate, put in a nutshell, comes down to a battle between two cooking giants: The late Edna Lewis and the all-amazing chef Thomas Keller. Chef Thomas Keller " . . . is the only American-born chef with two restaurants (The French Laundry and Per Se) awarded Michelin's highest rating (three stars)." (Newsweek, 2009)

Edna Lewis is a well-published southern author out of Virginia who is known for her award-winning recipes.

The debate is between chef Thomas Keller's Ad Hoc Kit (for the perfect fried chicken)- SOLD AT WILLIAM SONOMA STORE or ONLINE for only 14.95 (if bought online, you will pay slightly more for shipping) and has been proclaimed by "New York Times restaurant critic Frank Bruni . . . as nothing short of "phenomenal" (Newsweek, 2009) The kit contains:
Two packets of brine and two packets of flour coating.
Each packet brines or batters 8–10 pieces of chicken; all four packets can be used to create a party-sized batch of 16–20 pieces.
2lb. 2 oz. total.

AND Edna Lewis's true southern chicken recipe found here:

The revelation: Both chef Keller and Edna Lewis BRINE their chicken! I have never done this but what a great way to not only create tender poultry but inject layers of seasonings.
After brining overnight (using the Ad Hoc kit), the chicken is rinsed, dried, dipped in dry batter, dipped in buttermilk and re-dipped in the dry batter mix and fried at 320 degrees for 13 minutes. Creating multi-layers of season packed flavor and moisture with a crispy crust. A person could easily just nibble on the crispy crust and be happy. 
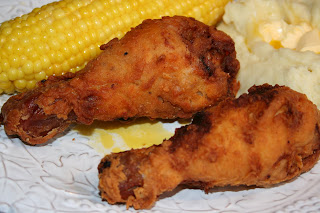
Edna Lewis is next on my list to try but chef Keller gave me a new way of approaching fried chicken. The seasoning mixtures in the brine opens a whole new thought process for infusing flavor and now I am obsessed with fried chicken once again. Thank you Newsweek for printing an article that helped re-direct and inspire my mind in the world of cooking.

In addition to the fried chicken, the time has come to use another baking concept. Pre-made peach pie fillings. Last summer, 30 pound boxes of peaches were purchased off farms in Eastern Washington for canning purposes. Some of the over-ripe peaches were not fit for canning. These peaches were trimmed up and mixed with ingredients for pies. I froze the peach pie fillings in pie plates and once frozen, popped them out of the plates and inserted the fillings into Ziploc bags for future use. Now, all that was needed was to make a pie crust, pop the frozen filling in the crust, add a streusel and bake. Easy!The pie was pretty juicy but the flavors were wonderful!My daughter, Ashley, was going on her first real job interview today so I decided to also bake her favorite sheet brownies with a milk chocolaty frosting. Whether the interview went good or bad, she would have brownies. Ashley was offered the job so the brownies were part of her celebration!
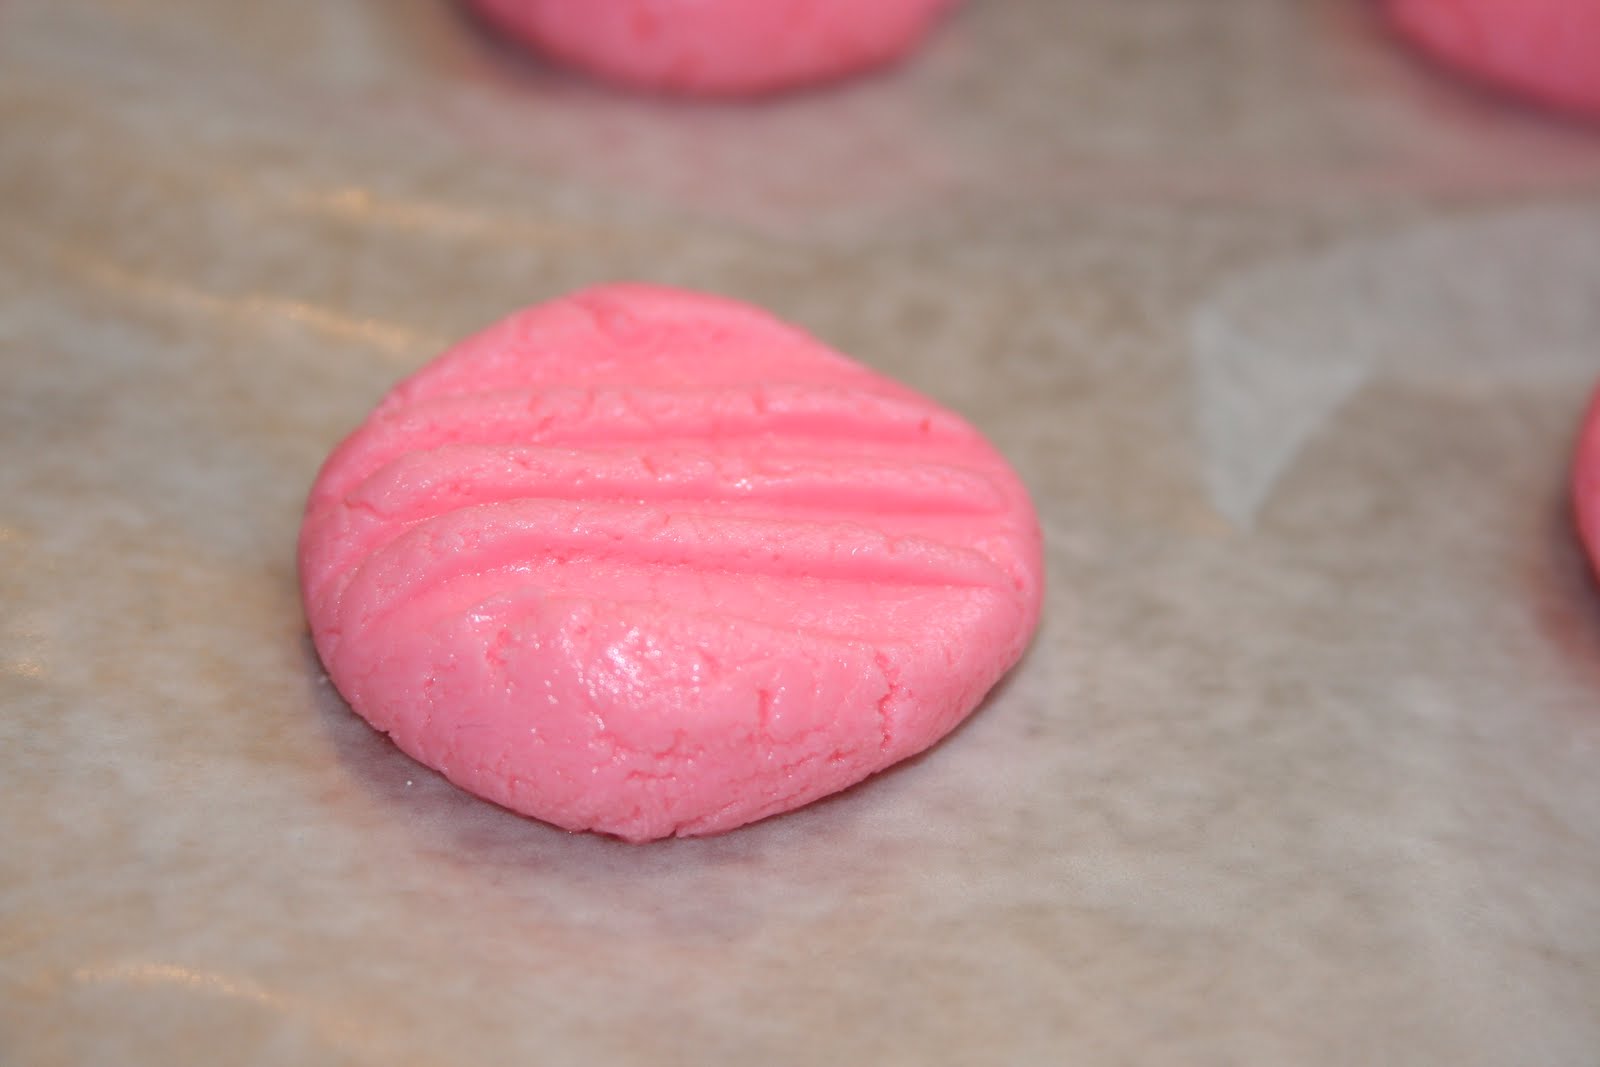